

📐 Getting Started
Dieser Inhalt ist noch nicht in deiner Sprache verfügbar.
In your very first step into the Semio workflow, we’ll start with a simple, hands-on example 🧱
We’ll model the Semio logo as a custom brick set and use it to explore the basic Semio tools, concepts, terminologies, and workflows 🖼️
From sketch to final design, you’ll learn how to break down your sketch into modular parts and lay them out — then snap everything together, just like building a LEGO model 📐
Before we jump in, we’ll take a quick look at the Semio workflow and the platforms you can use to do this 🛠️
🛠️ Designing with Semio: Your Platform Options
semio offers two main platforms for designing you modular systems:
🦗 Grasshopper Plugin
You’ll always start in Grasshopper, using the Semio plugin to model your Brick Set 🧱
This is where you define all the core elements of your modular system:
- 🧱 Create your Brick Molds
- Model Types — the custom molds that define your bricks
- 🧩 Create your Design
- Place Pieces — the bricks you use in your design
- Define Connections — the rules for how your bricks snap together 🔗
Perfect for advanced workflows, parametric logic, and integrating with existing Grasshopper setups 🧠🔧
🌐 Sketchpad
Use Sketchpad when you want a more visual, intuitive way to assemble designs 🎨
In Sketchpad, you can:
- 🧩 Snap together Pieces using your predefined brick set
- 🔁 Define Connections between Ports
- 🖼️ Visually lay out and iterate on your design with speed and clarity
Ideal for early design studies, collaboration, and fast iteration
🔄 Use One or Combine Both
Semio is designed to be platform-flexible 🔄
- 🧱 You can create Kits in Grasshopper and assemble Designs in Sketchpad
- 🧩 Or keep everything in Grasshopper
No matter how you work, your Kits and Designs stay ** reusable, and editable** across both tools ♻️
📝 Sketch Breakdown
Normally, you’d create your own design instructions from scratch ✍️
But for this tutorial, we’ve provided the steps you need to follow to reach the final design 🧩
Your sketch is split into two parts 🖼️:
- 🔲 Creating the Brick Molds
- 🔳 Creating your design
Each part helps you understand a different layer of the design logic 🎯
We’ll go through both in detail, step by step 🪜
🔲 Creating the Brick Molds
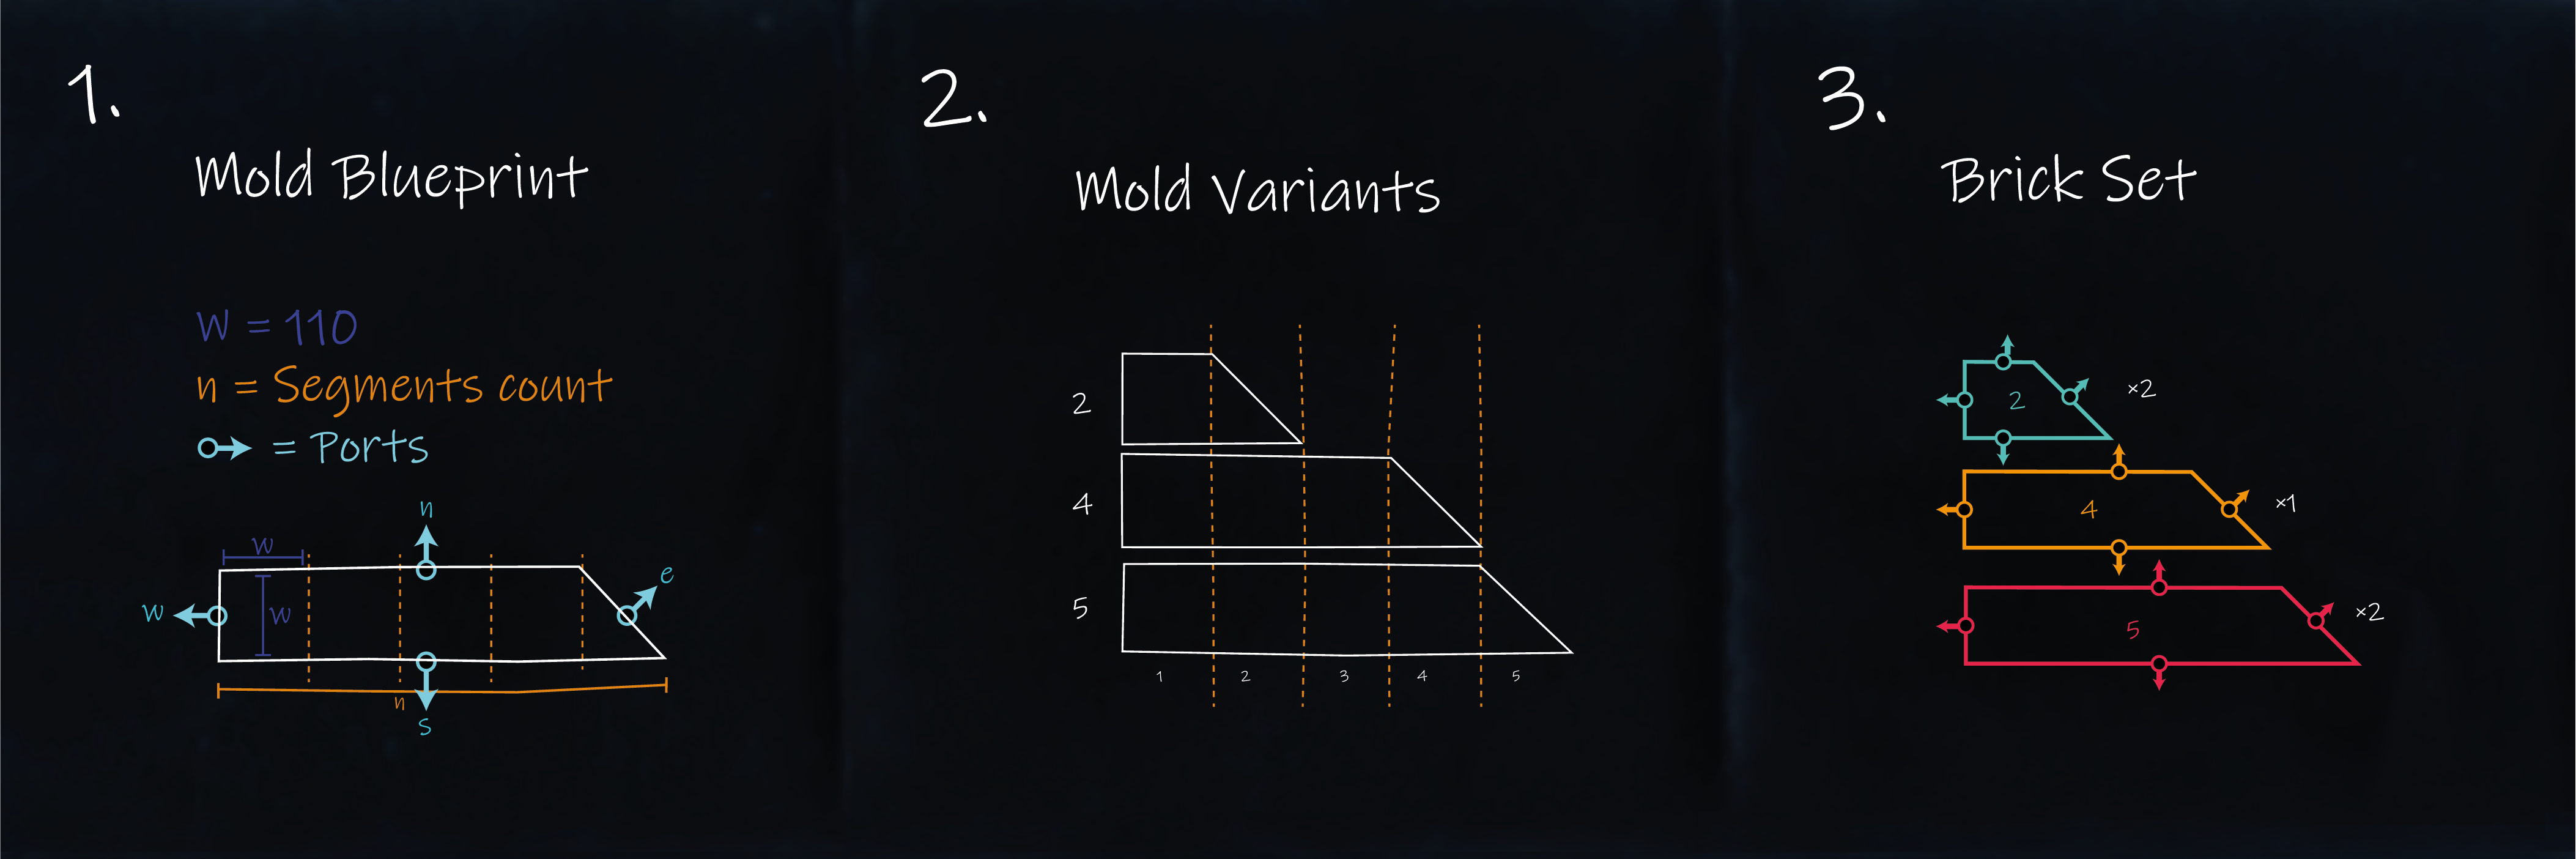
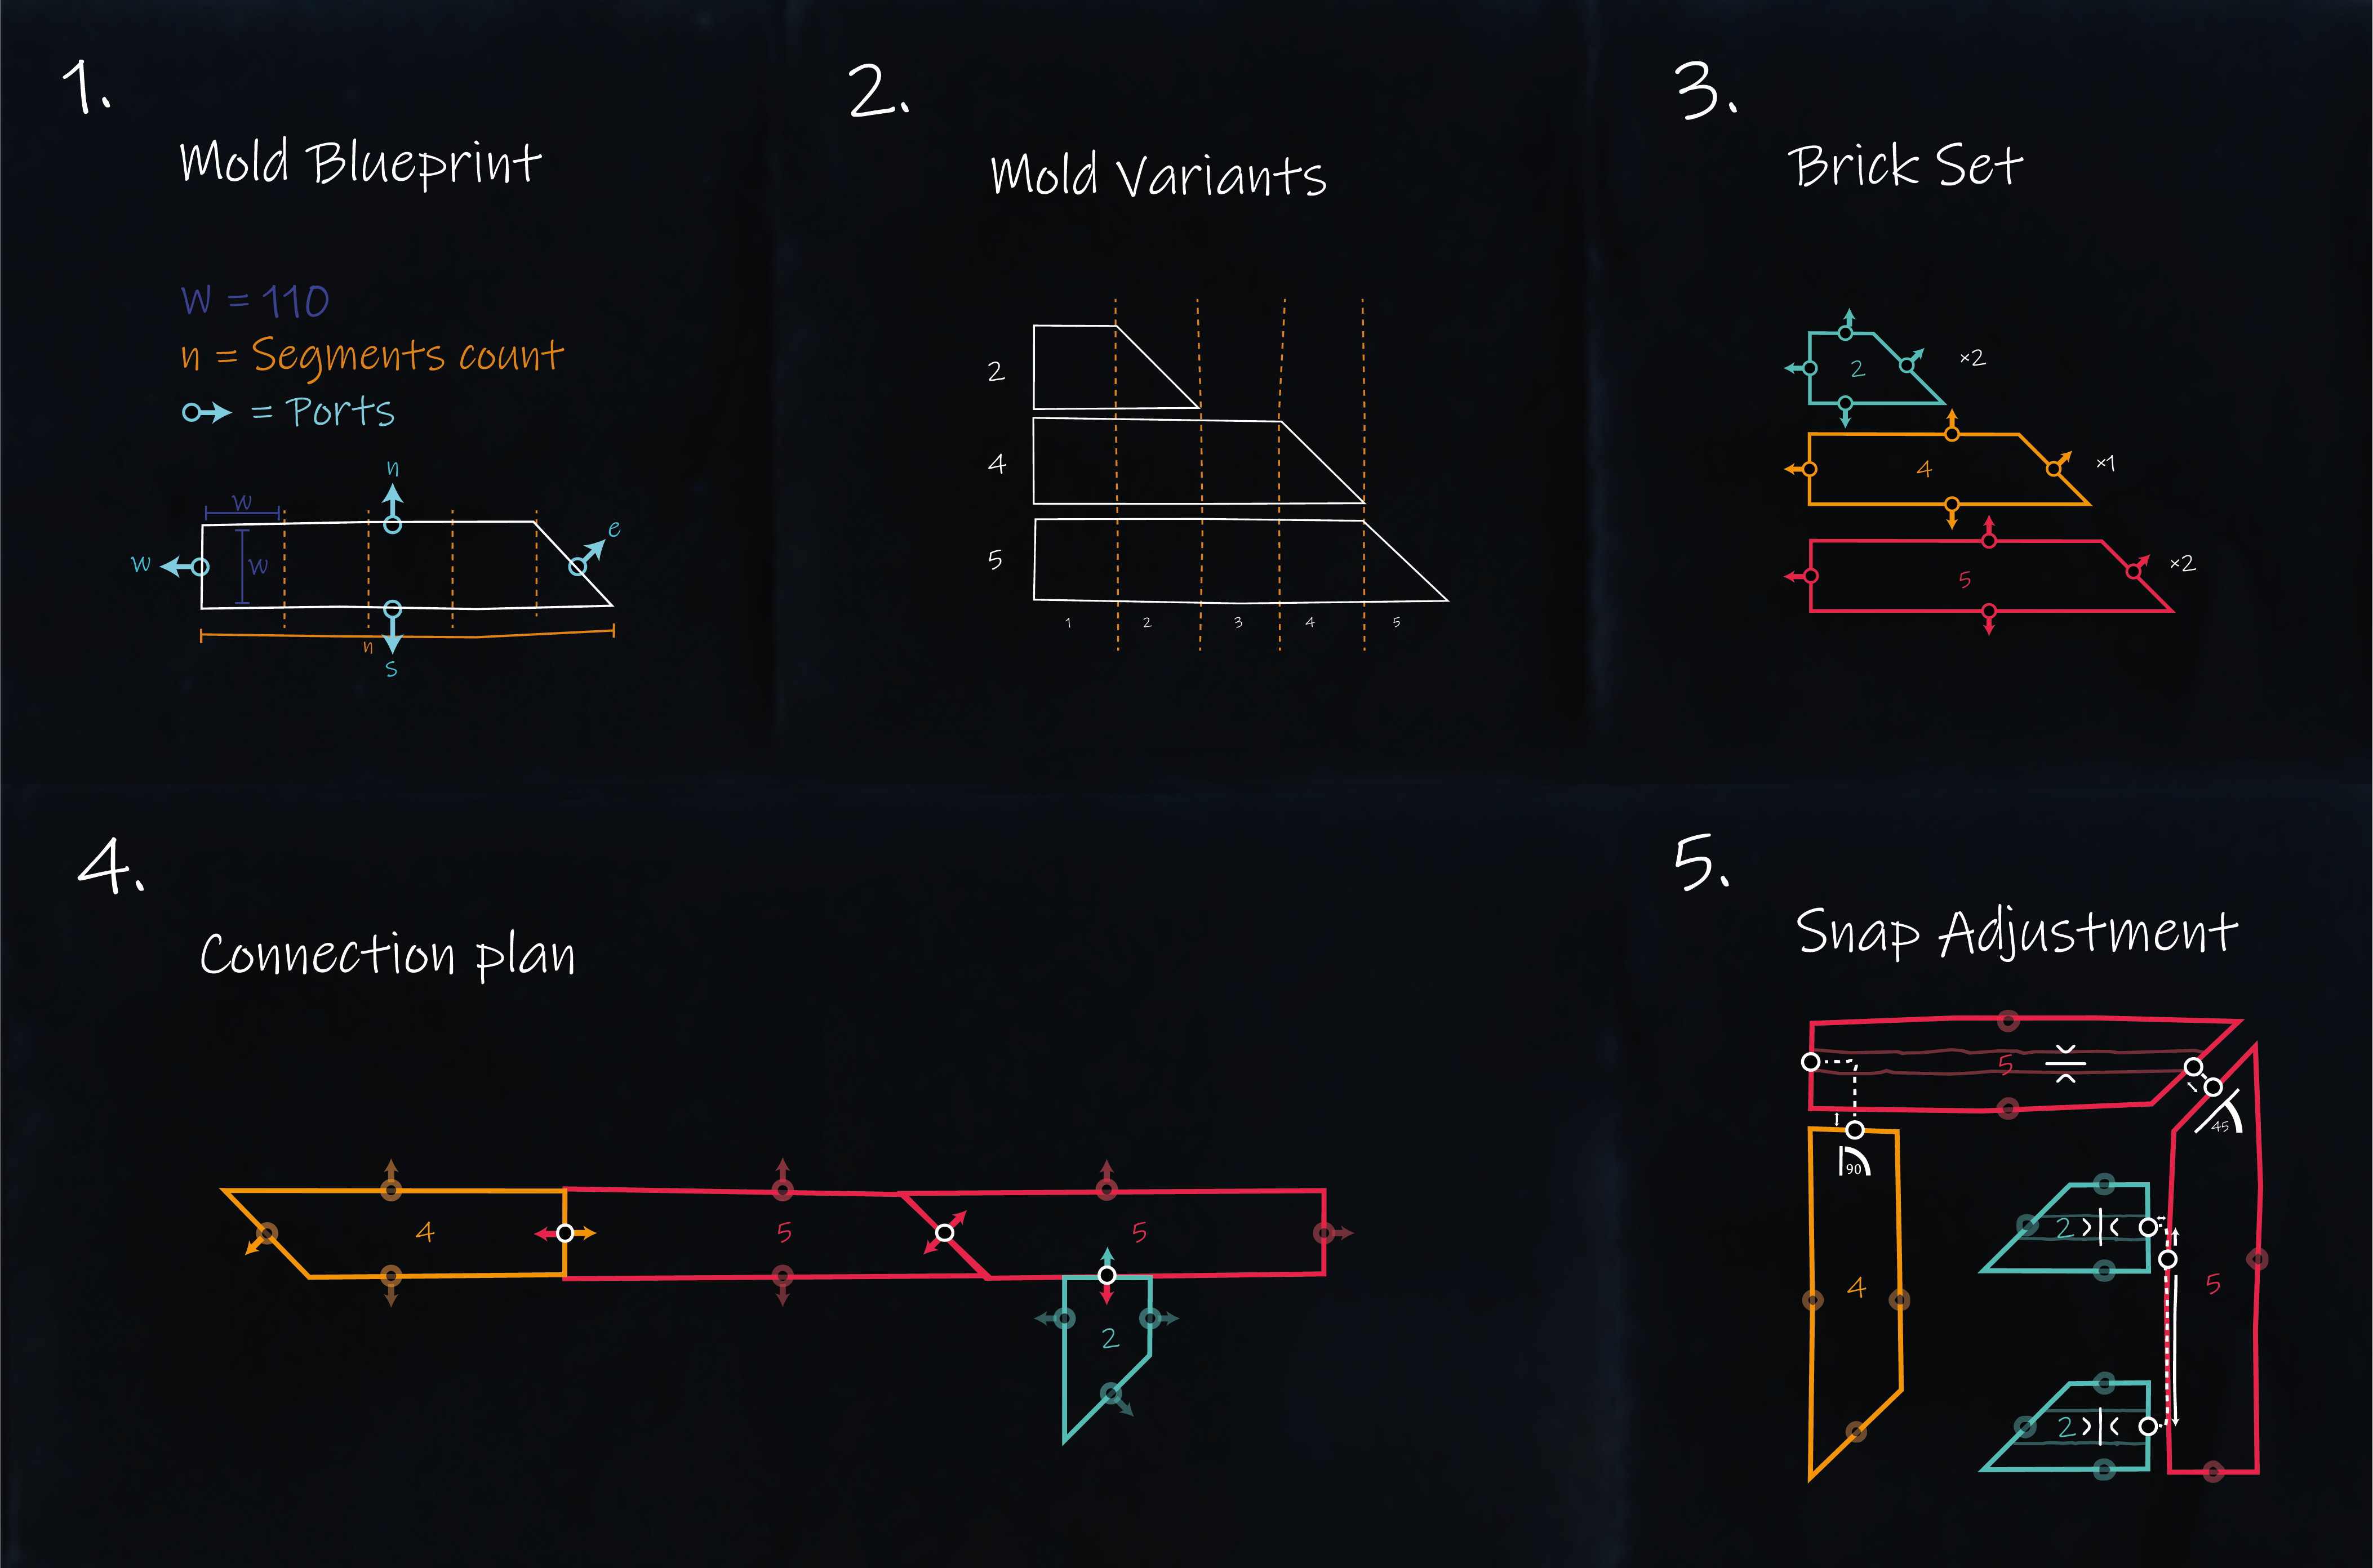
The mission in the beginning is to look at the Logo sketch and start spotting patterns 🔍
You’ll notice five shapes that look nearly identical — just with different lengths 📏
🧱 Think of them like LEGO bricks:
A 2-stud brick 🟦, a 4-stud brick 🟪, and a 5-stud brick 🟥
Same shape logic ✨ just stretched or scaled 📐
-
In Step 1 🔧 you’ll see the base shape and instructions to reach the desired outcome
A rectangle cut at an angle ✂️ with four docking points on each side ⚓
That’s the blueprint for creating your custom building block 📘
In this step, you are creating your Type — the unique mold for your bricks 🧱 -
In Step 2 📏 you’ll see three repeated Variants of that shape:
2️⃣, 4️⃣, and 5️⃣ units long
Here you’re defining the variations of your Type
Each Variant is like a different size of the same brick mold 🧱 -
In Step 3 📦 you’ll see your final casted bricks — the total number of bricks you need to create 🔢
In this step, you are creating Pieces, which are instances of the Type 🧱
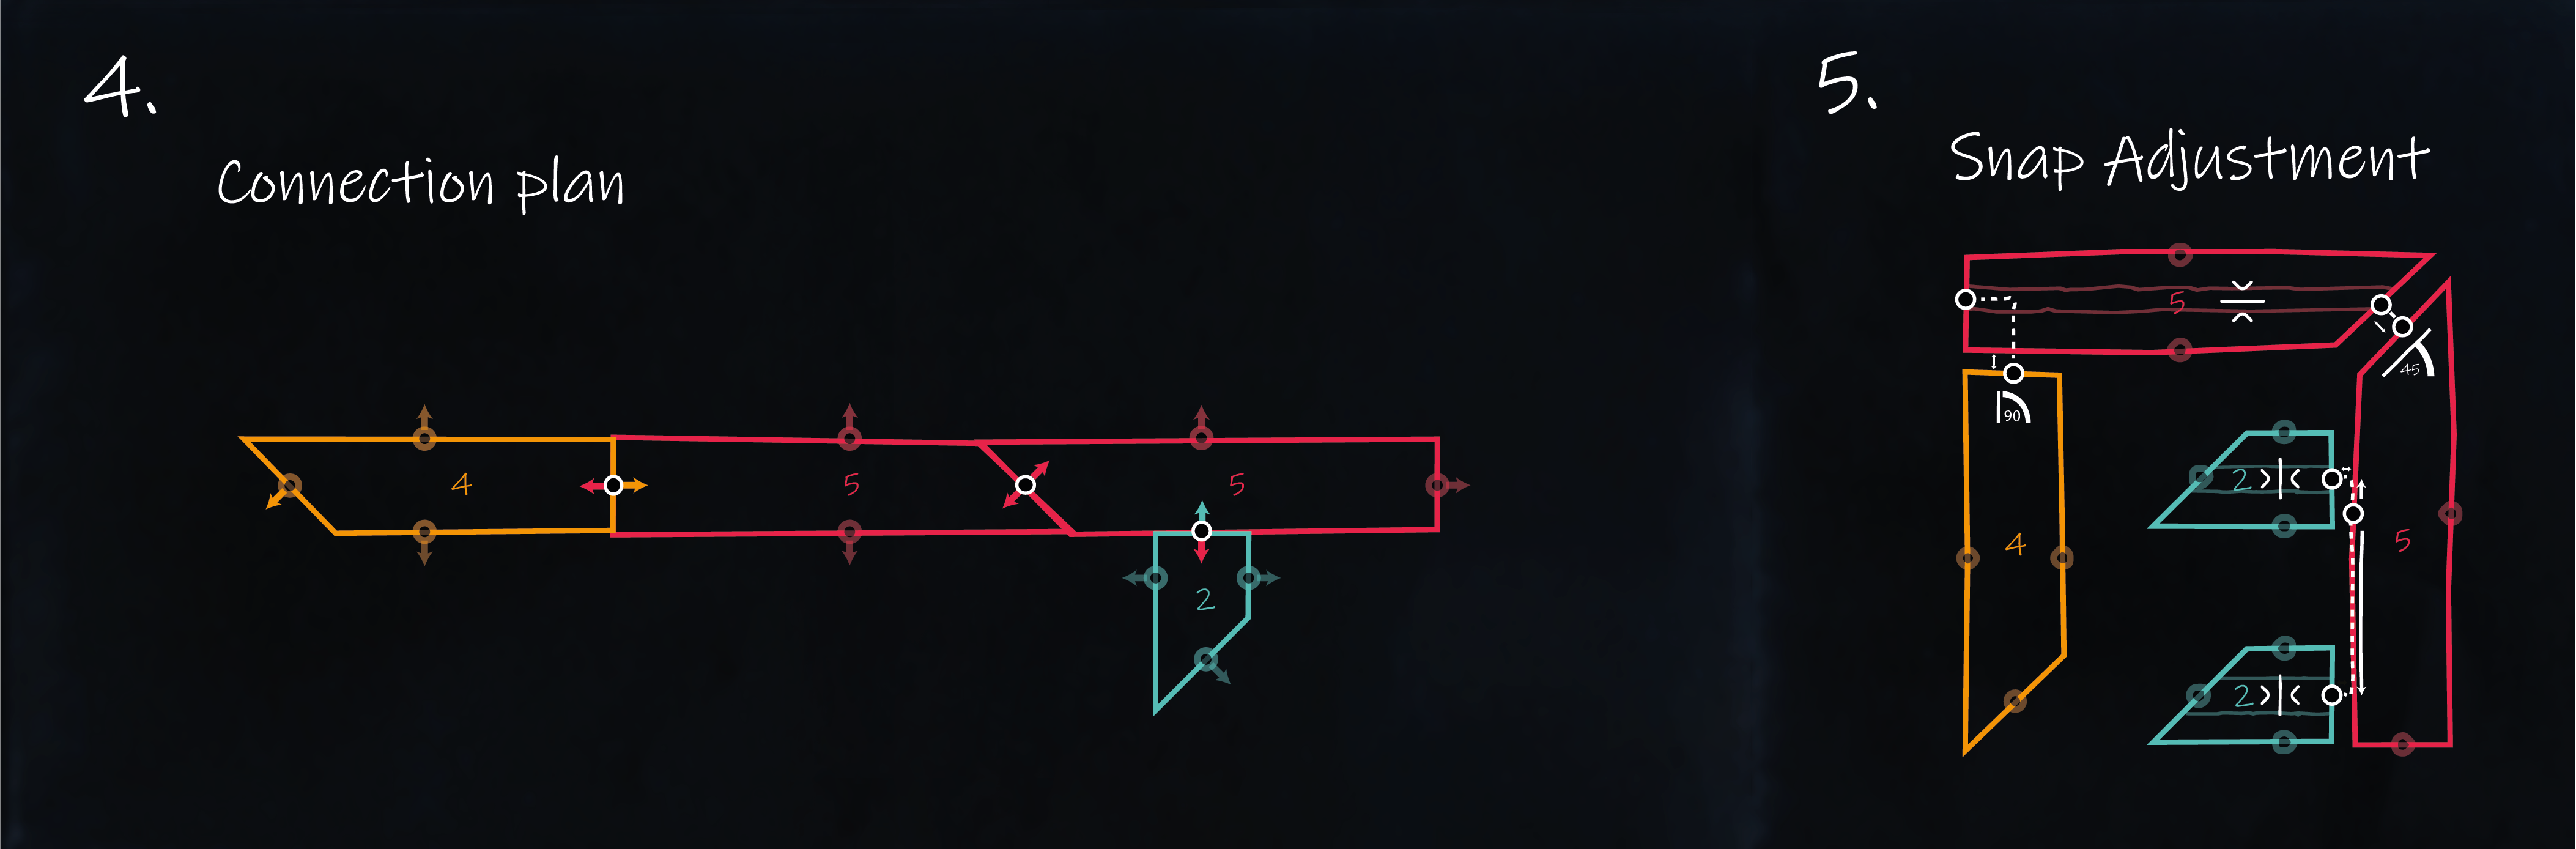
🔳 Assembling the Design
-
In Steps 4 & 5 📐 you’ll see the final assembly of your bricks into a design
This is where you snap them together to form your structure 🏗️ -
Each number (2️⃣, 4️⃣, 5️⃣) shows which Variant is used where 📍
-
◯⟶ Circles with arrows = Ports ⚓ — the snap points where pieces connect
-
🖋️ Black guidelines = Assembly instructions 🧭 — showing which Port connects to which, and how 🔗
We’ll explain all these parts as we move step-by-step 🪜 through building the design