

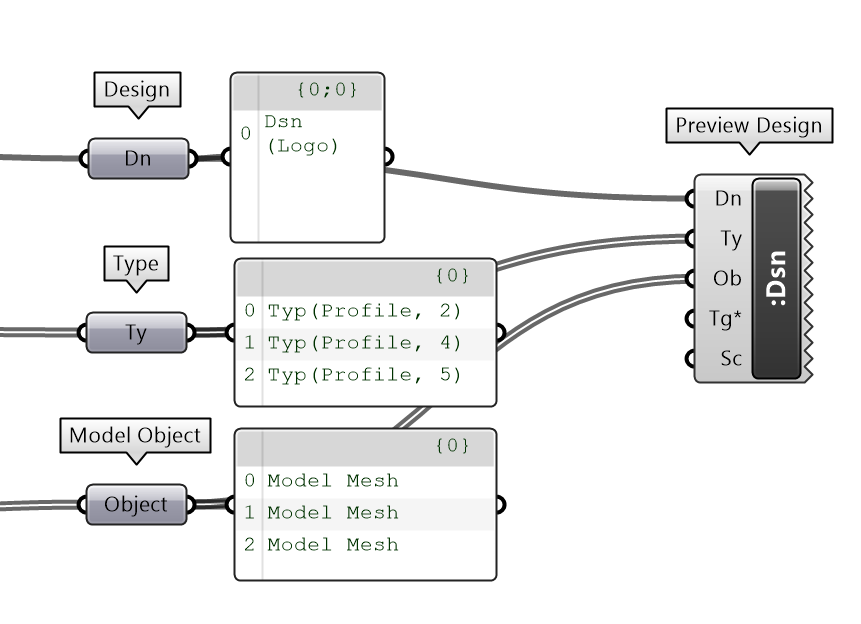
🖼️ Preview Design
🔍 From Logic to Look
Once you’ve done the following:
1️⃣ Placed your Bricks – by defining Pieces (instances of your brick molds)
2️⃣ Snapped them together – by setting up Connections between their Ports
3️⃣ Organized the build – by assembling them into a full Design
🎉 It’s time to see your LEGO model come to life!
Up to now, we’ve been working behind the scenes 🛠️ We’ve been defining meaning, relationships, and structure — not just drawing shapes
But unlike regular Grasshopper workflows, Semio doesn’t preview geometry automatically ⚠️ The visualization happens in a dedicated step 🎬 like revealing your finished LEGO model after following all the instructions
🧩 Visualize the Design
Once your modular system is ready, it’s time to see it come together!
To visualize the final assembly, Semio uses the Preview Design component in Grasshopper
🔌 Connect these inputs to the Preview Design component:
-
🧱 Design
The complete structure — tells Semio which Pieces are used and how they’re connected -
📦 Types
The brick molds used in the Design — including Ports and logic for snapping -
🧊 Representations
The geometry files (e.g..glb) orObjectsfor each Type and Variant — the actual shape of each brick
🔍 Once connected, the Preview Design component renders your full modular creation:
brick by brick, just like snapping together your final LEGO model on the table! 🧩
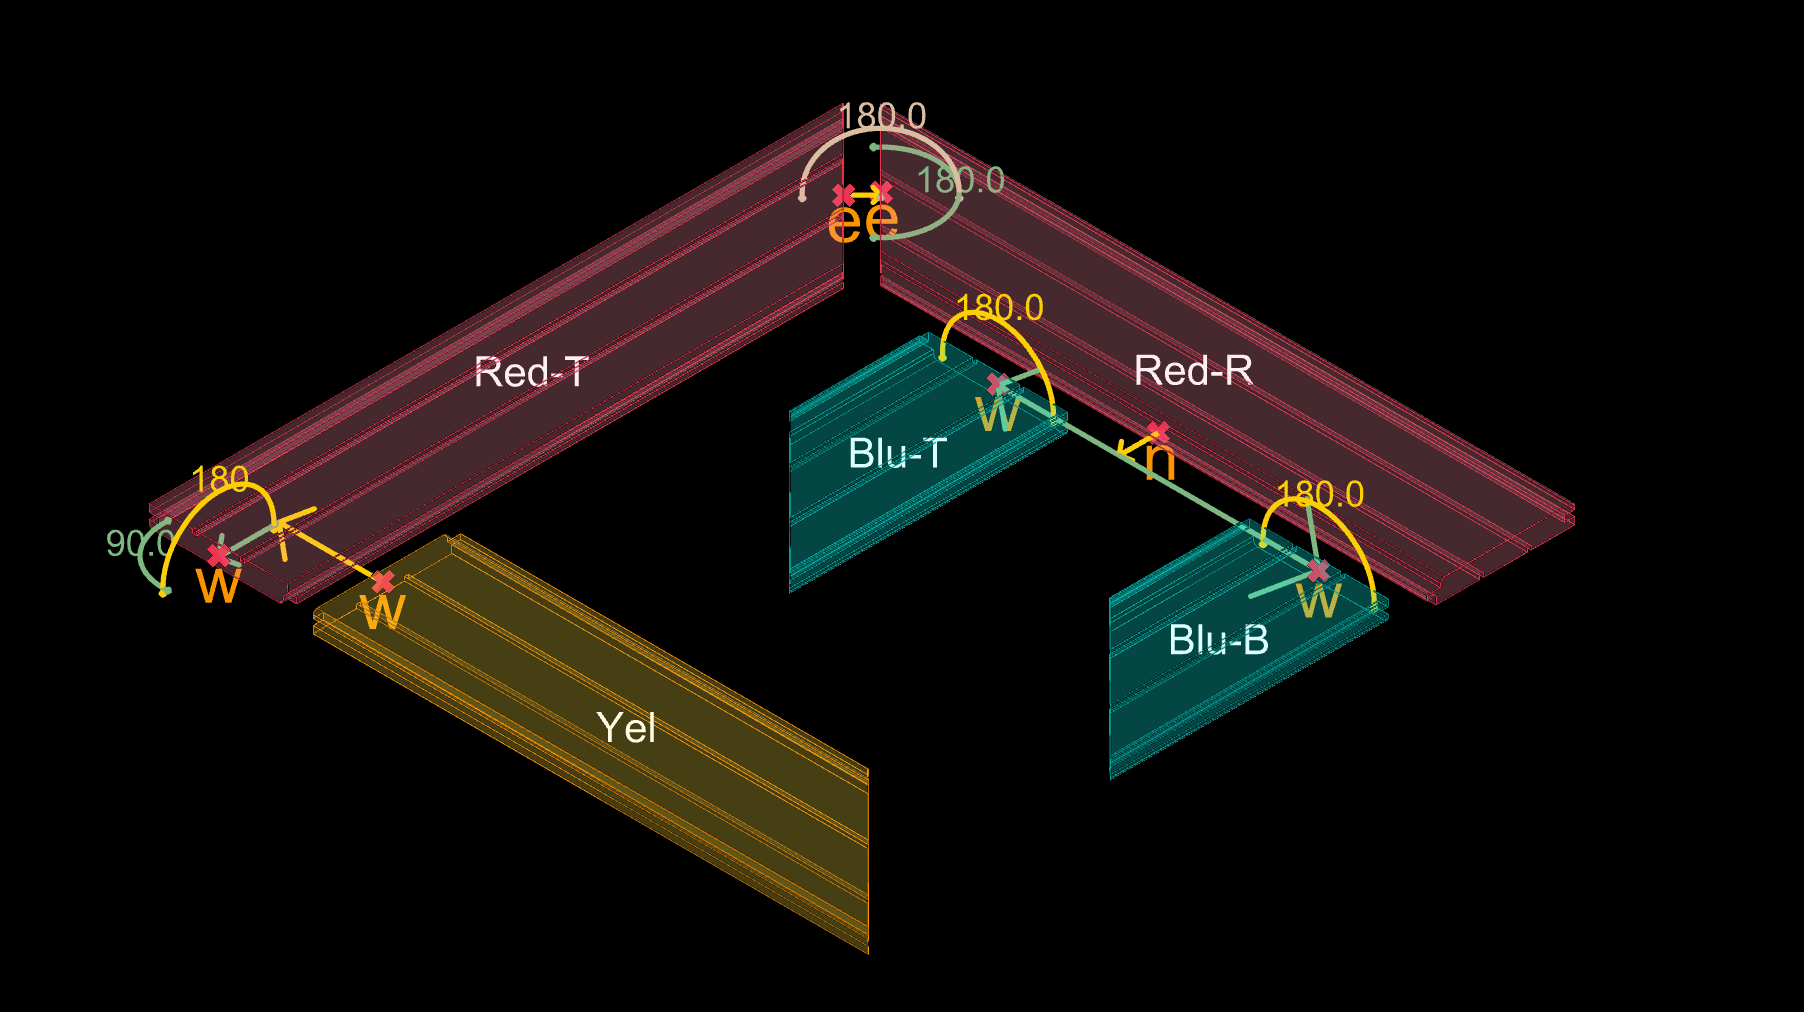
Here’s what gets visualized:
-
🧱 Brick Placement
Every Piece is shown in its final position — exactly where your Design logic places it -
🧲 Port Connections
All Ports are displayed — including their direction — so you can clearly see how Pieces are designed to snap together, and which ones are actually connected -
🔄 Snapping Adjustments
Rotations, gaps, shifts, or tilts added during connection are shown — making alignment easy to check
✅ That’s it — you’ve built and visualized your first modular kit in Semio!
From mold to model, every part now fits where it belongs